2. Computer-Aided Design#
This week’s task was to design, model, and document a parametric FlexLinks construction kit.
I learnt that Flex links are 3D pieces that are compatible with legos, with the special quality of having some flexible parts. This flexibility is in fact what makes these pieces so useful, they allow complex movements within a one-piece object, avoiding friction different pieces! This a huge win in terms of the durability and maintenance of the piece.
![]()
We used OpenSCAD and FreeCAD which are 3D modelling sofwares. In my case, I used OpenSCAD and my instructions will refer to this program, however I will briefly explain the differences between the two programs.
OpenSCAD allows for the creation of 3D models by writing scripts in a language is similar to a programming. Because of this, the user has a lot of cotrol over their designs, and parameters can be easily adjusted to modify the model.
OpenSCAD:#
OpenSCAD is a script-based 3D modeling software. Instead of using a traditional graphical interface to manipulate objects, users create 3D models by writing scripts in a programming language-like syntax. In the Fablab we recieved an Openscad initiation course.
Here is a link to the opencad website, which has very useful resources to get started.
FreeCAD: On the other hand FreeCAD is a more traditional parametric 3D CAD modeler with a graphical user interface (GUI). It is often used in engineering and architectural fields and has more of a visual and intuitive approach. The main reason I chose Opencad to design my 3D object is because it is easier to change the size of the different parameters.
Now I will explain several basic shapes that you can create in openscad and after, I will share my code and explain step by step the functions and parameters I used.
Openscad example :#
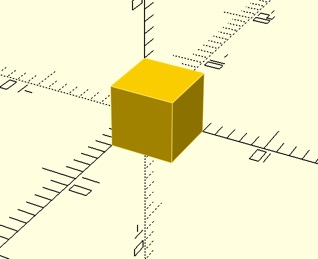
These examples showcase the basic syntax and concepts in OpenSCAD: Example 1: Creating a Cube
/// Creating a cube

cube([5, 5, 5]);
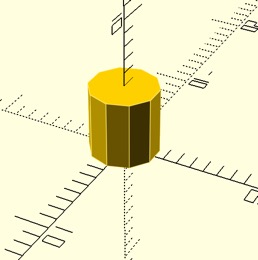
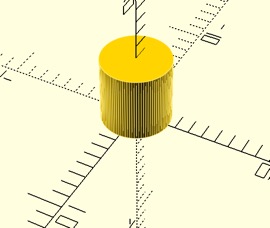
- Example 2: Creating a Cylinder
// Creating a cilinder
cylinder(h = 5, d = 5, $fn = 100);
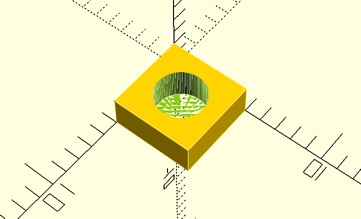
- Example 3: Combining Objects
$fn = 100;
difference() {
    cube([5, 5, 2]);  // Cube of size 5x5x2
    translate([2.5, 2.5, 0 ])
        cylinder(h=15, d=3);  }// Cylinder with height 15 and diameter 3}
This code demonstrates how to combine objects. It creates a cube and then subtracts a smaller sphere from it using the difference() function.
- Example 4: Module and Parameters
// Example 4: Using modules and parameters
module myBox(length, width, height) {
    cube([length, width, height]);
}
This example defines a module myBox that takes parameters for length, width, and height. Then, it uses this module to create a box with specific dimensions.
- Example 4: Hull function
$fn = 100;

hull() {
    cylinder(h = 5, d = 2);
    translate([5, 0, 0])
        cylinder(h = 5, d = 2);
}
 ```

- Example 5: Loops and Arrays


  <img src="images/openscad5.jpg" alt="Description" width="200">
// Example 5: Using loops and arrays $fn = 50; for (x = [0:10:90]) { translate([x, 0, 0]) sphere(4); }
## Creative Commons License
What is Creative Commons (CC)?
CC is non-profit organization that gives creators easy-to-use legal tools for sharing their work. It helps you control who can use, remix, or share your stuff while making sure everyone knows the rules.

 So, if you want to make your creative project available to others but still want to say how they can use it, CC licenses are the way to go. They make everything simple and clear.

When you're doing an open-source project, like working with OpenSCAD, it's highly important to include a license. You do this by including a file in your repository a file named LICENSE and providing here the full terms and conditions of the license your projects fall under. For example, I used the CC BY-SA. and i pasted this on my LICENSE file:

Creative Commons Attribution 4.0 International (CC BY 4.0) Full license text available at: https://creativecommons.org/licenses/by/4.0/legalcode

Also, you should include a note at the beggining of your openscad work that states the creative license you have chosen. It can look something like this:
// My OpenSCAD Design // License: CC BY 4.0 (https://creativecommons.org/licenses/by/4.0/) // You are free to share and adapt this design as long as you provide attribution.
It is important to place you **LINCESE** file in your root directory, alongside your main files, which is where people are expected to find it.
Here are some if the main licenses used and a summary of how they allow user to interact with the work.

- License Symbol  Description
CC BY (Attribution)
Allows distribution, remixing, and adaptation for any purpose, provided proper attribution is given.
- CC BY-SA (Attribution-ShareAlike)
Similar to CC BY, but derivative works must also be shared under the same terms.
- CC BY-ND (Attribution-NoDerivatives)
Allows redistribution, including for commercial purposes, as long as the work is not modified and proper attribution is given.
- CC BY-NC (Attribution-NonCommercial)
Permits remixing, adaptation, and distribution for non-commercial purposes, with proper attribution.
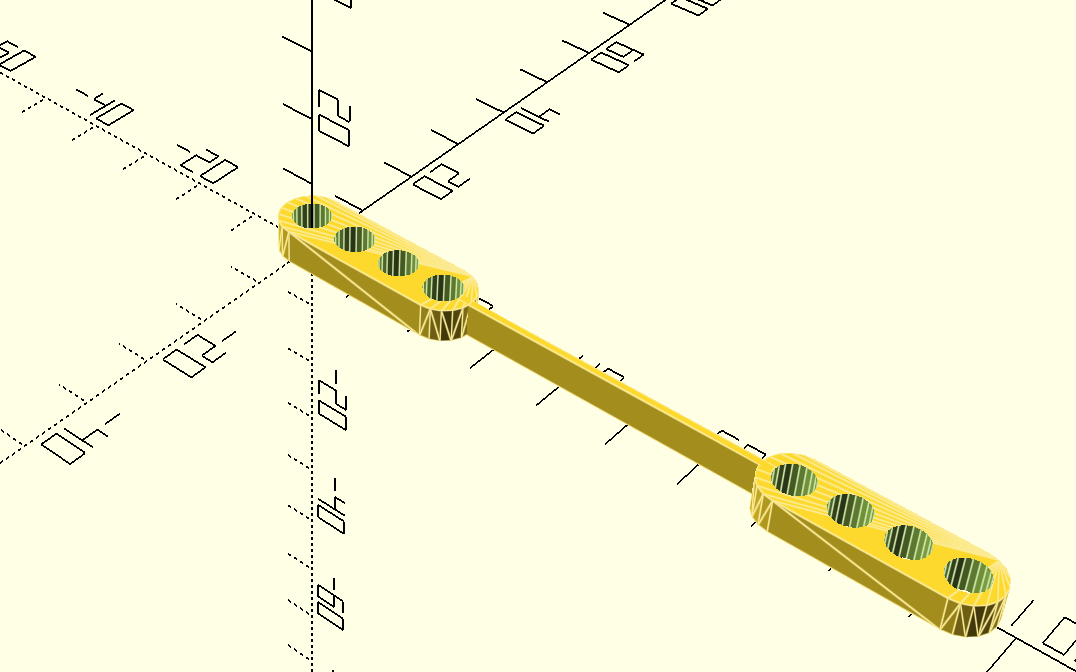
$fn = 20;
\Define the main module for creating the object
module create_object(height, n_holes, hole_rad, hole_sep, string_width, string_length, a, b, c, alpha=0.95, beta=0.95) {
\Calculate bar length and width
bar_length = (n_holes) * (2 * hole_rad + hole_sep) +  hole_sep ;
echo(bar_length);
bar_width = 2 * (hole_rad + hole_sep) * beta;
\ Function to create a bar with holes at a specified offset
module create_bar_with_holes(x_offset) {
    difference() {
        // Create the bar
        hull() {
            translate([x_offset, b, c])
                cylinder(h = height, r = bar_width / 2);

            translate([x_offset+ bar_length, b, c])
                cylinder(h = height, r = bar_width / 2);
        }
// Calculate the starting point of the holes to be inside the bar edges
        hole_start = x_offset+ hole_sep;
        hole_spacing = 2 * hole_rad + hole_sep;
// Create holes in the bar
// The reason I divide the height into 2 is because if not you can’t see the holes
        for (i = [0 : n_holes ]) {
            dx = hole_start + i * hole_spacing;
            translate([dx, b, c + height /2]) {
                cylinder(h = height * 1.5, r = hole_rad, center = true);
            }
        }
    }
}
// First bar with holes create_bar_with_holes(a);
// String section between bars
translate([a+ bar_length+(bar_width/2), b - string_width / 2, c]) {
    cube([string_length, string_width, height]);
}
// Second bar with holes, positioned after the string create_bar_with_holes(a + bar_length +(bar_width / 2)+ string_length); }
// Now you can call the create_object module with parameters. Feel free to modify the number of holes, the separtio between them or the length of the string to obtain different results.
create_object(4.9, 4, 2.6, 1, 1, 30, 0, 0, 0);
````