3. 3D Printing#
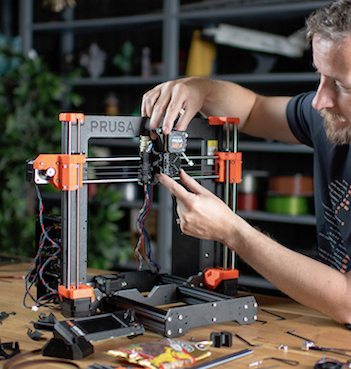
This week marked our first contact with the 3D printers. (Exciting !) We printed the OpenSCAD models we designed the week prior and we also learned the skills necessary to print more designs of our own for our future Fablab project.
In this blog I will share my first experience with 3D printing as well as a small guide to using Prusa Slicer
I was inspired by another Fablab student from year 2023/2024 This is the link to his web page His knowledge on 3D printing really helped me
Initial Setup:#
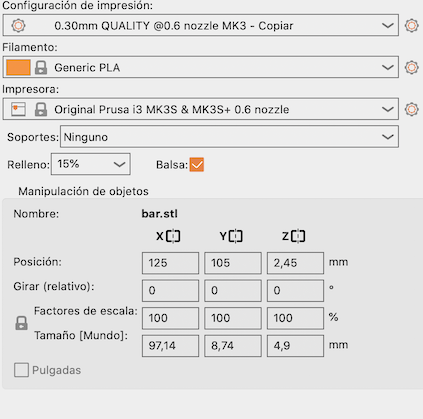
Once inside the app Prusa Slicer
- choose the printer Prusa i3 MK3/S/S+ 3D printer.
- Generic PLA
- 0.3 noozle
Once you have set up your printer, drag your 3D model into the slicer:
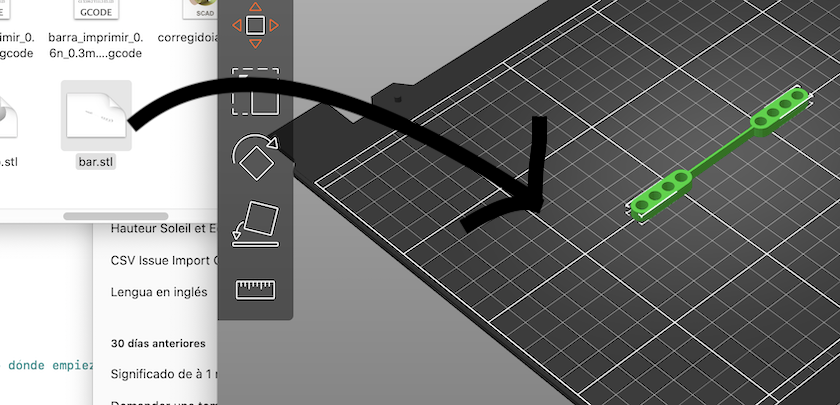
The bar on the left helps you find the optimal position of your piece when printing so that it is stable and needs the minimum support
![]()
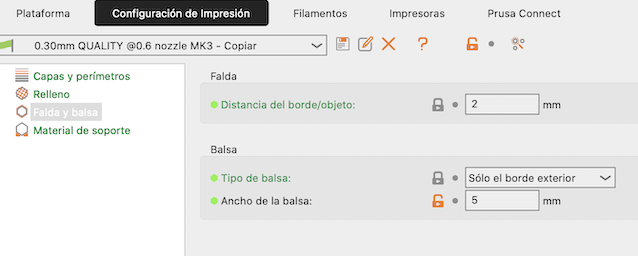
This image below shows how to add a brim to your object
Prusa will slice your piece, which means give instrucions to the printer, if your piece needs support, you can either add it yourself or ask prusa to add the support for you.

Exporting the G-code:#
Exporting your G-code is very important, put it inside an SD card and introduce it into the printer. As simple as that. The printer will tell you important info like how long it takes to print or the temperature of the filament.
My (first) experience with 3D printing#
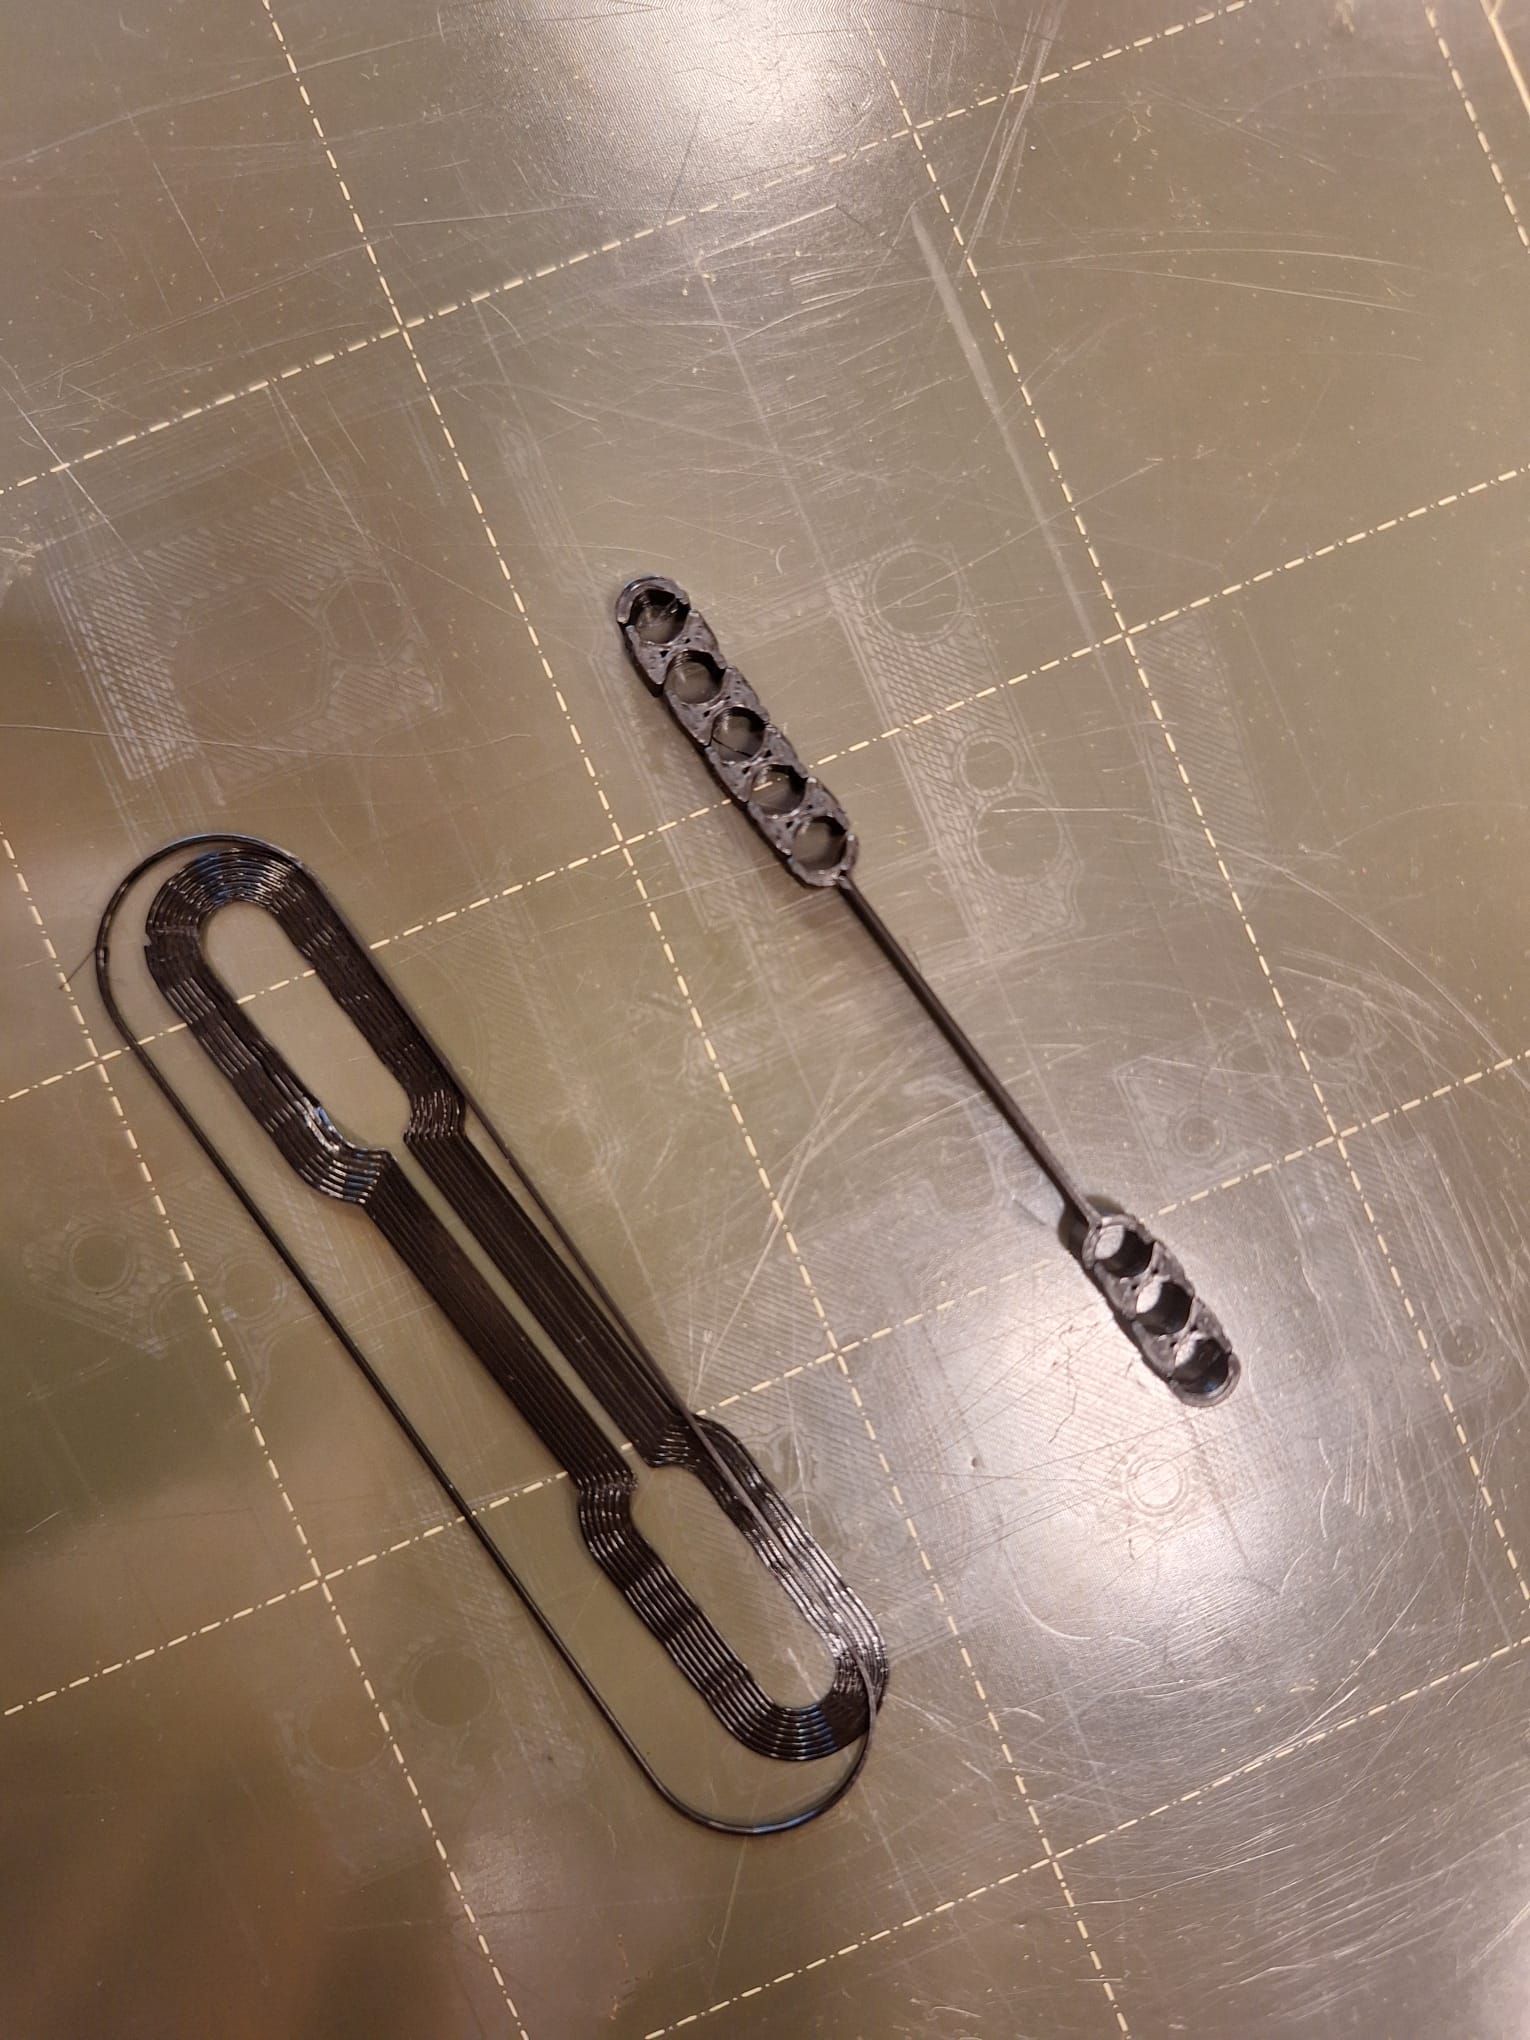
The image above is my first 3D printed object. I was inspired by the flex link lego pieces that can fit into legos but also have flexible parts that allow for mobility.
Here is a link to the flexlinks model that inspired my design
My purpose was to create a code that would allow me to instantly modify the parameters of the object such as the number of holes or the length of the string as I wanted.
The bar is flexible and the size and separation of the holes was chosen so that it would fit with lego pieces.
However, the result wasn’t as expected and the sepation from the holes to the edge wasn’t wide enough and my flexlink piece broke :(
If somebody want to replicate this piece i would advise to weep the minimum thickness of tge machine at 2mm and not 1